by Ine
Hiya there!
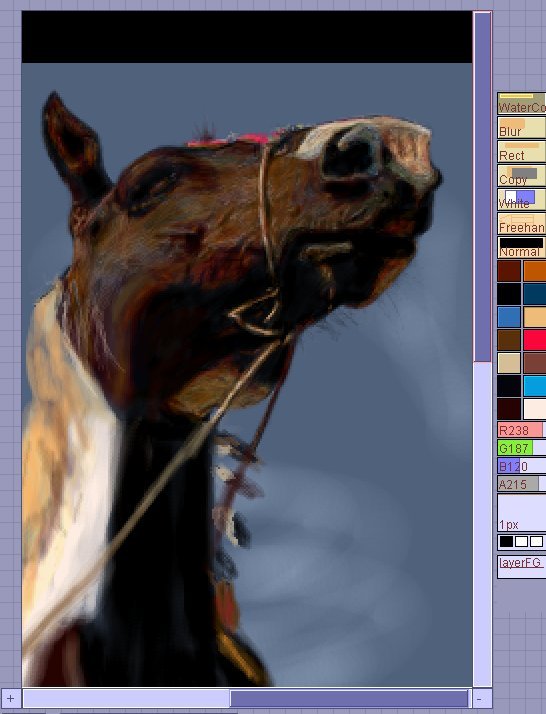
Welcome to my tutorial on how to draw realism in Paintbbs! You are probably
interested in how to make your oekaki look like a photo, seeing as you are
reading this. I will try to explain how I draw my realism oekakies by using
screencaps. Keep in mind though, that this is the way I do it; there are many
different ways on how to draw realism, and it's best to find a way that is easy
for you. Now, enough talking, let's get to the tutorial itself!
I take it you all know how to draw on oekaki,
so I'll start directly with the real stuff. First you choose a photo you are
going to work with. Start with an easy photo, and take more difficult ones when
you are familiar with realism.
|
|
We switch
back to the foreground layer now. Make the base colors that you'll need
for the sketch of the drawing. Don't use the colors you get in the
palettes, but make them yourself. You can make as many colors as you
want; I mostly only use about 12 colors, plus black and white. Save your
palette if you fear losing it. |
As you can see on the screencap on the left, the
finished sketch has no real details yet, and only consists of basic shapes with
the colors you will need. The color palette I have now, is the one I'm going to use for the entire drawing. Some colors (like the blue from the sky), can be changed to other colors, because you already have them in your background, which makes it easy to select them again if you'd need them. |
Now we are going to
start with the detail work. Zoom in on the part you want to work on, and choose a 1 pixel watercolor brush with the opacity at 220. This opacity makes it easier to add soft detail; you can still change the opacity for when you have to color bigger parts. Now, choose the right color to start working with. Pay close attention to the reference photo you are using. It's best to start with the head of the animal/human you are drawing, because that is the most important part of the image. |
As you can see here,
you'll have to use quite some different colors to give your image a
realistic look. Try to work with the colors you have in your palette
already, but don't be afraid to make new ones from time to time to work
with. Working with a 1 pixel sized brush takes some time, but it allows you to add more fine details to your drawing. Also the eraser (called 'White') is a handy tool. Whenever you have a color somewhere that you want to get rid of, use the eraser on it. Change the opacity of the eraser to soften some colors in your drawing. |
Zoom out on your drawing
from time to time to make sure that everything still looks fine. After
some time adding the detail, you'll see that the image will start to
shape up and will have a quite realistic look already. When you zoom out, you'll probably notice some spots you'd want to work on a bit more, or that you need to fix up a bit to make it look better. When an area needs to be lighter or darker, simply pick a bigger watercolor brush, change the opacity to something very low, and then go over that area to make it lighter (with light color like white) or darker (with a dark color like black). |
After some more work, your drawing
will start to look more complete. Be sure to add enough detail,
like whiskers, little hairs, veins etc. It's all these little things that
make your drawing even more realistic. If you're a slow drawer like me, you may want to take some breaks while working on a realism drawing. You need a lot of patience to make a realism drawing with a 1 pixel brush. Taking breaks will prevent you from losing interest in your drawing too soon and it will also help you to spot mistakes. When you stop looking at your drawing and then come back after a while, you'll spot mistakes easier. |
As soon as you start to loose
interest in what you're doing, switch over to a different part of
the drawing and start working there. I got tired of detailing the horse's head, so I went to work on the human's head. When you draw a human, the blur tool will help you a lot to get the skin to look smooth. Change the opacity of the blur tool so that it doesn't blur the skin colors too much. On this drawing, I didn't have to use the blur tool that much, because the skin is supposed to be rough. Pay close attention to all the facial features; when any of the features is misplaced even a bit, the face could look a bit awkward. Use the copy tool to move things around easily. |
More work done, better result. As you can see, I finished the Indian's face and the feathers. I also changed some of my palette colors to work on his accessories. |
Even the less important parts need
detail to make your drawing look realistic enough, so don't forget to put
some time on those too. By now you should already know how to work on your realism, so I'll skip all the other parts of the drawing so you won't die from boredom over here. Only thing left to do is the background. You can use a bigger brush for this if it isn't too detailed. But don't slack off on this part, because it will help to make your drawing look even better. |
Et voilą! The image is finished.
Add your signature as a final touch to make sure that other people
will know this masterpiece is yours. Thanks for reading all of this and happy drawing! |